Bandon Trails
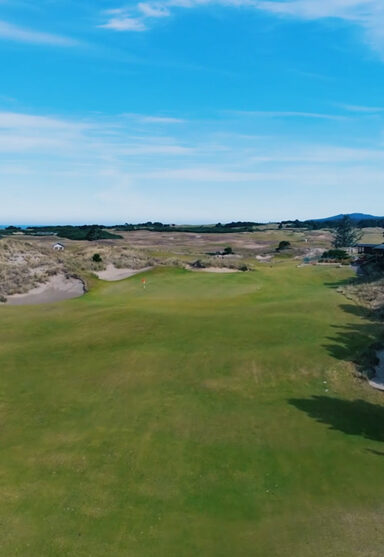
When Bill Coore and Ben Crenshaw began working in the sand to uncover our third course, they faced the challenge of following Bandon Dunes and Pacific Dunes. Opened in 2005, Bandon Trails begins atop a massive sand dune, then quickly opens into a sprawling meadow. The routing then works higher into the coastal forest, before finally returning to finish in the dunes. The course is enjoyable to walk and is a constant reminder of how the game was originally created among inland rolling dunes with dramatic ocean vistas.
Course Camera
Soak up the remarkable views from the Bandon Trails Clubhouse on our 24/7 high resolution course camera.
Scorecard & AerialCourse Map
The score presents itself when you’ve put in the time. Study up.
Shop Bandon Trails Gear
The latest styles from your favorite brands logo’d with the Bandon Trails western tiger swallowtail butterfly.
Dream Golf Feature
In the endless debate of which course is best at Bandon, Golf Channel commentator Shane Bacon lays claim on Bandon Trails.

“Bandon Trail . . . takes its rightful place on the short list of pilgrimages all golfers must make before they die – because odds are golf in Heaven can’t compare.”
– GOLF Magazine

With the prevailing wind at your back, a driver may not be required. The fairway is much wider than it looks so relax and make a comfortable swing. Your tee shot should favor the right side of the fairway, as most shots will feed back to the center. The second shot is slightly uphill through a saddle
of sand dunes.

Judging the impact of elevation change and wind will make club selection critical on this par three.
The place to miss, although not visible from the tee, is short and left of the green. Par will be a struggle after any tee shot that misses right of this green.

Take aim at the bunker in the middle of the fair way as only the best tee shots can bring it into play. Once on the fairway, factor the wind direction and carry distances to setup the ideal yardage for your third. The back of this green is deceptive and drops off abruptly.

A sand ridge running across this fairway challenges the player off the tee. Distances to carry the ridge are shortest on the left, which will also give you the clearest view of the green. Balls clearing the ridge will shoot forward toward the green. If you are faced with a blind approach the only safe miss is short and right of the green.

Don’t let the length of this hole give you a false sense of security. Double check the hole location and total yardage to this long green. Club selection is critical, as your ball must end up on the same tier of the green as the hole. This green is the most undulating on the course, and a two putt will be well earned.

Aggressive players may choose to carry the small fairway bunker off the tee. There is plenty of room left of the fairway bunker, but will offer a longer approach. Short and right of this green leaves a cautious player the best chance at par.

Swing freely on this long uphill par four. The fair way is very generous. Don’t be afraid of the large fairway bunker on the left as the best approach to the green is from the left side of the fairway. A fairway wood or long iron second shot will be required to this elevated green. The green is shallow on the left side and protected by a bunker behind.

This reachable par four gives you a great opportunity to weigh risk vs. reward. A well-struck drive may find the putting surface, but long putts on this undulating green will be no bargain. A lay-up off the tee to your ideal wedge yardage may be the more prudent play.

Framed by dense coastal forest, the scale of this hole is deceiving. Check the yardage to the large fairway bunker on the right, as it may narrow the fairway in the landing area. From there, depending on the wind direction, you will have to decide whether to lay-up or blast away! In either case, there is much more space to receive your shot than it appears. At the green, you can comfortably miss long or left.

This fairway is very generous. The open right side of this hole lures you in that direction, which will leave you a longer approach crossing open sand to the green. Be sure to take enough club and fire at the middle of the green. There is plenty of room to miss left.

This hole does not bend right as much as it appears. A strong drive down the left side of this enormous fairway provides the best angle into this green. Even the best tee shots will leave a lengthy approach to this green guarded by water on the right.

Take plenty of club on this long par three. The green slopes will help funnel the ball toward the middle of the green. Subtle contours short and right will collect errant shots and help them toward the green.

Accuracy is the focus on this medium length hole. The ideal angle requires a tee shot toward the left fairway bunker. The dense native area right of the fairway comes quickly into play. An accurate approach to this elevated green is critical, as a deep bunker and dense foliage guard the right side.

Another short par four with a multitude of options. A driver may leave you a shorter and only slightly easier second shot. If you elect to play it safe from the tee, it is best to favor the left side of this fairway, as shots missed to the right will face a blind approach at the most shallow angle to the green. This hole’s greatest defense is its green – the smallest on the course.

Playing into the prevailing wind, this hole will require a strong drive to get as near to the cross bunker as possible. This will leave a short iron shot to an undulating and well protected green. A precise approach is a must, as you want to avoid leaving yourself above the hole, and a false front awaits any shots that come up short.

Against the prevailing wind, this uphill par five will play longer than the yardage indicates. The tee shot is visually intimidating. The slopes on the right side will funnel errant shots back to the fairway. On your approach, beware of a strategically placed bunker on the right, and factor your distance to it to ensure you finish comfortably short or beyond it.
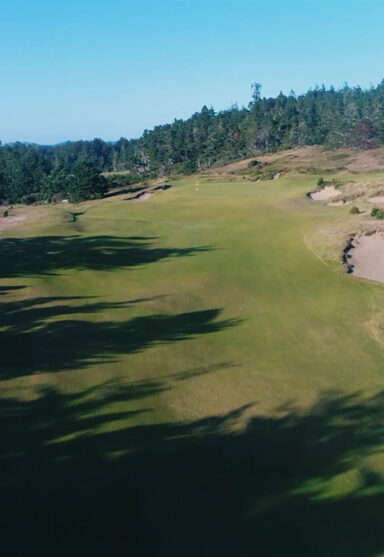
A par three framed by a menacing bunker right and two bunkers back and left. A false front forces you to fly the ball well onto the green. However, the green will feed balls into an open collection area long and right of the green, from which a par is manageable. A prevailing crosswind makes it all the more difficult to launch a high, soft shot on to this green.

The fairway is undulated and guarded by bunkers on the right and left sides. A well positioned tee shot down the left-center of the fairway will provide you with a shorter distance and the best angle into the green. Yardage is key on the approach; take note of the prevailing wind and the elevated green as shots played past the false front will provide the best results. Enjoy your walk to this green as you have reached the Trails End.
